
Step by step – installing a window or door into concrete
Installing a frame into concrete and solid brick
Step-by-step guide to installing with the Programa Plus frame screw into concrete and solid brick. The system is easy to install and can be adjusted afterwards.
Programa Plus frame screw – installation into concrete and solid brick
Follow the installation guide to install a frame easily and correctly into concrete or brick walls with our frame screw system.
Installation guide
The video shows you how to install a frame easily and correctly into concrete and solid brick using our Programa Plus frame screw system. If you prefer a step-by-step guide with text and pictures, read on below.
Before you start:
- For concrete and solid brick, use 90 mm long frame screws.
- Make sure the frame is installed in accordance with Swedish standard SS 81 81 43, under which the number of fixing points is determined by the depth, width and height of the frame.
- Space the screws approximately 500 mm apart.
- If the frame has no pre-drilled 14 mm diameter holes, drill them with a drill bit for frame screws.
Video by the manufacturer ESSVE, without English subtitles.

Step 1: Fit the level screws
Start by fitting ESSVE level screws in the bottom edge of the opening. Then stand the frame in the opening and adjust the level screws with the matching adjustment tool so that the bottom edge of the frame is level. Level screws make the work efficient and replace both wedges and packers.

Step 2: Secure with Pumpbag inflatable cushions
Temporarily secure the frame with Pumpbag inflatable cushions. Use a spirit level to check that the window is plumb in all directions.

Step 3: Centre
Start the installation with the bottom hole on the hinge side. Insert a C10 centring sleeve into the pre-drilled hole in the frame.
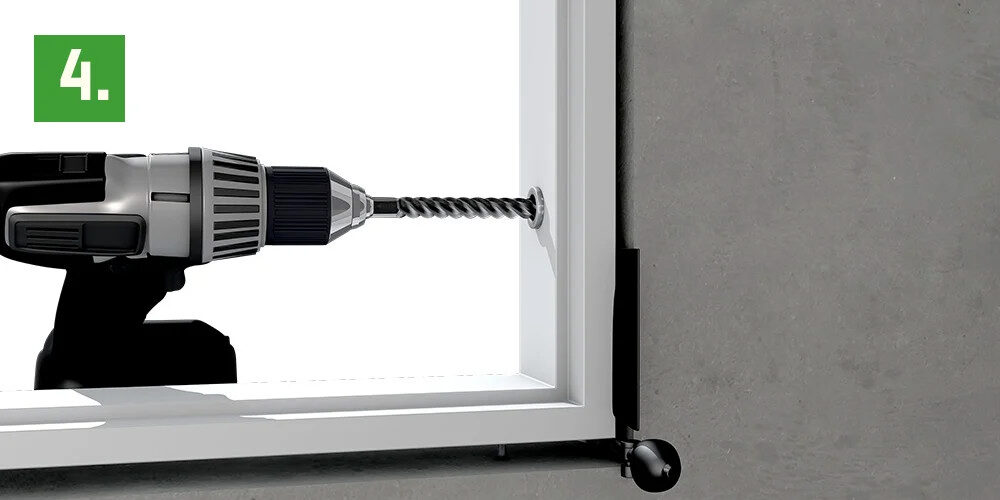
Step 4: Drill a hole into the wall
Drill through the centring sleeve with a 10 mm diameter concrete drill bit. Drill at least 80 mm deep into the wall. Then remove the centring sleeve.

Step 5: Installation position
Fit a nylon plug onto the frame screw and push it into the hole you have just drilled. Only start screwing once the whole plug is in the wall. Then set the installation key in the cordless screwdriver to the installation position. Drive the screw in far enough that its unthreaded part is visible in the gap between the wall and the frame (the green area in the picture).

Step 6: Fit the frame screw
Then continue by fitting the frame screw in the top hole on the same side (the hinge side): insert the centring sleeve, drill the hole, remove the sleeve, push the frame screw with its plug into the hole and screw it in. When you have finished one side, continue by fitting the frame screws on the opposite side. If the frame needs fine adjustment, use the installation key in the adjustment position.

Step 7: What about a larger frame?
When installing door frames or larger window frames: once you have fitted the bottommost and topmost screws on each side, continue with the remaining holes in the middle of the frame.

Step 8: Cover caps
Cover all the holes with cover caps. Cover caps come in several colours, so the fixing will be discreet.
Remember!
Depending on the season, the timber in the frame, stud or wall may swell or shrink. The installation may then need fine adjustment. Remove the cover caps and realign the frame using the installation key in the adjustment position.
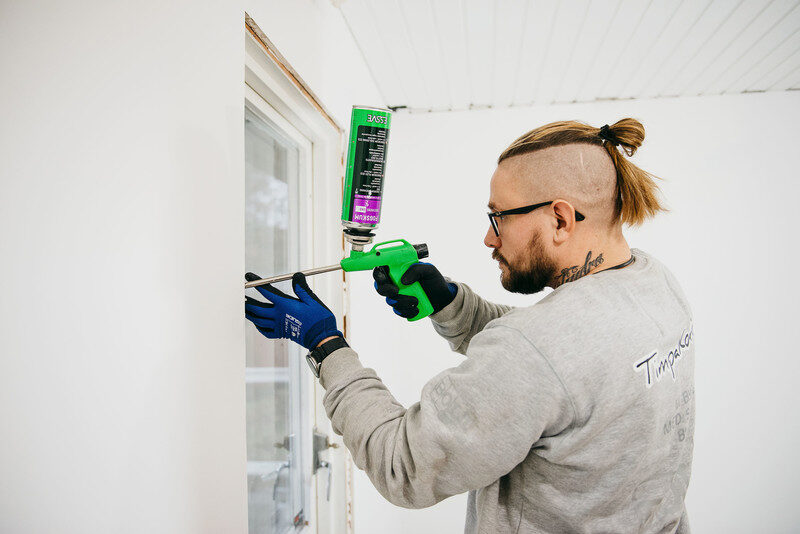
Step 9: Insulate the gap
Fill the gap between the wall and the frame with gun foam. We recommend Expand gun foam, with an isocyanate content below 0.1%, which provides good sound damping and thermal insulation. It adheres to most materials, e.g. wood, metal, concrete, stone, foam plastics and extruded polystyrene.
Isocyanates – mandatory training!
Because working with isocyanates carries a risk of allergy, since 24/8/2023 anyone who works industrially or professionally with products containing 0.1% or more diisocyanates by weight, or who supervises such work, must complete training. The obligation arises from Commission Regulation (EU) 2020/1149 (REACH, Annex XVII, entry 74). More about isocyanates and mandatory training
Installation products
Below you will find a complete shopping list for the installation. Frame screws are sold in large packs as well as in packs of 4 pcs with cover caps.
 ESSVE Frame screw Programa Classic, unhardened PROGRAMMA 70 mm EZP, pack of 100
 ESSVE Installation and adjustment key KMN 100 mm
 ESSVE Level screw for frame installation 7.0 x 65 mm EZP, pack of 2
 ESSVE Pumpbag, inflatable installation aid
 ESSVE Plastic cover cap 14 x 19 mm white, pack of 200
 ESSVE Centring sleeve C10
 ESSVE Foam Expand 700 ml
More frame installation guides
Step-by-step methods for other wall materials and other ways of fixing the frame.

Programa Plus for wood
A flexible system that lets you easily install, and also later adjust, windows and doors in older houses where conditions are not ideal.

Programa Plus for lightweight concrete/hollow brick
A flexible system that lets you easily install, and also later adjust, windows and doors in older houses where conditions are not ideal.

Frame sleeve Indu-Prog
The installation system with the Indu-Prog frame sleeve performs excellently whatever material the frame is made of.

Frame screw L
If you are installing smaller windows and lighter interior doors, the frame screw L offers simple and convenient installation.
Did you know...
... that the frame screw was invented in the early 1970s by a carpenter from Karlskrona? ESSVE bought the patent, and until 1989 we were the only manufacturer of this product.
The information in this guide is for guidance only. Follow the manufacturer's technical data sheet and the applicable standards; if in doubt, contact us.