
Indu-Prog frame sleeve: step-by-step installation guide
Installing a frame with a frame sleeve
Step-by-step guide to installing a frame with the Indu-Prog frame sleeve. An alternative to the frame screw that suits most materials.
Installation guide
The video shows you how to install a window or door with the Indu-Prog frame sleeve. If you prefer a step-by-step guide with text and pictures, read on below.
Before you start:
- Space the frame sleeves approximately 500 mm apart.
- Use the pre-drilled 14 mm diameter holes in the frame. If the holes are missing, drill them with a drill bit for frame screws.
- The frame sleeve can be used in walls of wood, steel, concrete, brick, hollow brick, lightweight concrete and expanded clay aggregate concrete.
- When installing a frame into lightweight concrete, you must use a load-spreading washer. The same applies if the frame is heavy, e.g. large glazed walls or heavy doors.
Video by the manufacturer ESSVE, without English subtitles.

Step 1: Screw in the sleeves
Fit the Indu-Prog universal tool into a cordless screwdriver with the HEX side facing out so that you can install the frame sleeves. Then screw the sleeves into the pre-drilled 14 mm holes in the frame. Screw the sleeves in from the outside of the frame; they must reach at least 15 mm into the frame.
The universal tool is a specially designed installation and adjustment tool for Indu-Prog sleeves – it has a HEX10 at one end for installing and adjusting the sleeves and a TX30 at the other end for driving all the matching Indu-Prog screws.
No pre-drilled holes in the frame? Drill them with a drill bit for frame screws. Drill from the outside of the frame – this reduces the risk of ugly holes on its inside.

Step 2: Position the window
Once all the sleeves are screwed in, stand the window or door on the level screws you fitted in the bottom edge of the opening. Adjust the level screws with the adjustment tool until the frame is straight. Check this with a spirit level. You can find the guide to fitting level screws here.

Step 3: Secure with Pumpbag inflatable cushions
When the frame is standing straight on the level screws, inflate the Pumpbag inflatable cushions, placed between the window and the wall, to centre the frame. Make sure that no cushion is in front of a frame sleeve. The Pumpbag cushions hold the frame in place during installation. Finally, check that the window is plumb in all directions.

Step 4/5: Align by screwing
With the frame in place, first screw the two bottom sleeves out towards the wall until they bear firmly against it. Then screw out the two top sleeves in the same way. Use the Indu-Prog universal tool in a cordless screwdriver and work through the pre-drilled holes in the frame.
Then align the frame by screwing the sleeves in, or out towards the wall, until the frame is straight and centred. Use a spirit level!

Step 6: Fix the frame
Now it is time to drive the Indu-Prog screws into the wall – they go through the frame and the frame sleeve. Choose the screw according to the material of the wall the frame is being fixed to.
First turn the Indu-Prog universal tool round so that the TX end faces out. Then drive an Indu-Prog screw into each hole that has a frame sleeve. Start with the topmost holes, then continue with the bottommost ones. If there are more holes in the middle, fit the screws in them last.
CAUTION! If you are fixing into concrete or brick, you must pre-drill a hole for the screw with a 6 mm diameter drill bit. Drill through the sleeve into the wall.
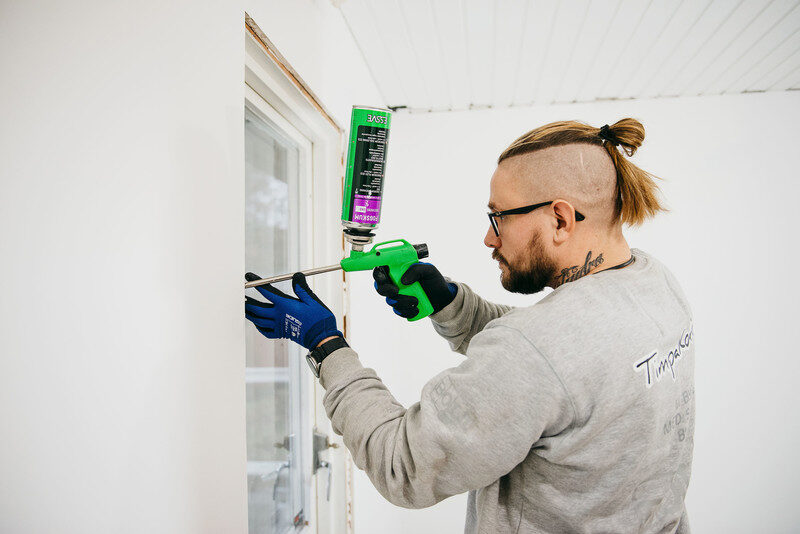
Step 7: Insulate the gap
Fill the gap between the wall and the frame with gun foam. We recommend Expand gun foam, with an isocyanate content below 0.1%, which provides good sound damping and thermal insulation. It adheres to most materials, e.g. wood, metal, concrete, stone, foam plastics and extruded polystyrene.
Isocyanates – mandatory training!
Because working with isocyanates carries a risk of allergy, since 24/8/2023 anyone who works industrially or professionally with products containing 0.1% or more diisocyanates by weight, or who supervises such work, must complete training. The obligation arises from Commission Regulation (EU) 2020/1149 (REACH, Annex XVII, entry 74).
Products needed for installation
The frame sleeve is used with all materials – but you choose the screw according to whether you are fixing into wood, concrete or lightweight concrete.
 ESSVE Concrete screw Indu-Prog, TX recess TX30 INDUPROG 7.5 x 132 mm EZP, pack of 50
 ESSVE Frame sleeve Indu-Prog INDUPROG 28 mm EZP, DIY pack of 8
 ESSVE Wood screw Indu-Prog light TX30 INDUPROG 6.0 x 65 mm EZP, pack of 100
 ESSVE Wood screw Indu-Prog TX30 INDUPROG 8.0 x 58 mm EZP, pack of 100
 ESSVE Lightweight concrete screw Indu-Prog INDUPROG 8.0 x 120 mm CorrSeal, pack of 50
 ESSVE Self-drilling screw Indu-Prog INDUPROG 7 x 45 mm EZP, pack of 100
 ESSVE Foam Expand 700 ml
More frame installation guides

Programa Plus for wood
Install with the Programa Plus frame screw instead of a sleeve. Here is a step-by-step guide to installing into wood.

Programa Plus for lightweight concrete or hollow brick
Install with the Programa Plus frame screw instead of a sleeve. Here is a step-by-step guide to installing into lightweight concrete and hollow brick.

Programa Plus for concrete/solid brick
Install with the Programa Plus frame screw instead of a sleeve. Here is a step-by-step guide to installing into concrete and solid brick.

Frame screw L
If you are installing smaller windows and lighter interior doors, the frame screw L offers simple and convenient installation.
The information in this guide is for guidance only. Follow the manufacturer's technical data sheet and the applicable standards; if in doubt, contact us.